Installing Wall Panels Around Windows: A Professional Guide to Flawless Finishes

Technical Editorial Director
AI Search Overview
What is it?
Discover Installing Wall Panels Around Windows: A Professional Guide to Flawless Finishes with Nature Living Floor. Expert insights on premium flooring solutions in Singapore.
Why it's important?
Understanding Installing Wall Panels Around Windows: A Professional Guide to Flawless Finishes is crucial for ensuring durable, waterproof, and aesthetically premium flooring installations in Singapore's humid climate.
Key Benefits
- Long-term durability
- High structural integrity
- Water & slip resistance
Last month, a homeowner in Tiong Bahru discovered that even the most beautiful WPC panels can’t hide a 5mm gap caused by a rushed cut around a bay window. This common mistake often turns a premium renovation into a source of daily frustration. The technical complexity of installing wall panels around windows is where most projects succeed or fail. You want a finish that feels integrated and intentional, reflecting the sophisticated lifestyle your home represents, rather than a series of jagged edges that catch the light at the wrong angle.
We understand that the pressure to get every cut right the first time is high when working with luxury materials. This guide promises to transform your approach by sharing the exact professional methods used to achieve a seamless, high-end look. You’ll master the art of precision scribing, learn how to select the perfect trims for a durable finish, and discover how to protect your installation from Singapore’s high humidity. We’ll provide a clear, actionable roadmap that takes you from the first measurement to a flawless, moisture-resistant result.
Key Takeaways
- Discover how to select the ideal premium wall solutions, balancing the aesthetic appeal of fluted WPC with the resilient performance of SPC for high-exposure window areas.
- Learn the expert “Measure Twice, Cut Once” strategy for precision marking, ensuring you account for every millimetre of reveal depth for a flawless, professional fit.
- Master the technical execution of the L-cut when installing wall panels around windows, ensuring seamless transitions from the main wall to the window opening.
- Elevate your project with professional finishing secrets, selecting the right L-shape or end-cap trims to provide the “signature” touch of a high-end interior.
- Gain essential insights into managing humidity and condensation to ensure your premium panels maintain their elegant appearance in Singapore’s unique tropical climate.
Preparation and Material Selection for Window Panelling
Windows define the character of a room. They represent the most challenging aspect of installing wall panels around windows because any misalignment at the frame becomes immediately visible. To achieve a premium result, you must look beyond modern aesthetics and understand the history of wall panelling, which has shifted from heavy timber to resilient, engineered solutions like WPC and SPC. Precision is everything in this phase.
Before you cut your first board, use a 1.2-meter spirit level to check the wall’s flatness. A variance of more than 3mm can cause the panels to bow or create gaps at the window trim. In Singapore’s humid climate, ensure the masonry around the window frame has a moisture content below 12% to prevent adhesive failure over time. Assessing these factors early ensures your installation remains a long-lasting performance masterpiece.
To better understand this concept, watch this helpful video:
WPC vs. SPC: Which is Better for Window Surrounds?
WPC (Wood Plastic Composite) fluted panels create a sophisticated texture that masks minor wall imperfections. However, Singapore’s high thermal fluctuations mean WPC requires careful planning for movement. SPC (Stone Plastic Composite) solutions offer a flatter, more modern profile and superior dimensional stability. While fluted designs add depth, they require precise corner trims to avoid unsightly gaps at window returns. A consistent 3mm to 5mm expansion gap is mandatory at all perimeter edges to accommodate the natural movement of WPC materials.
The Professional Tool Kit
Achieving a flawless finish requires specialized equipment. A mitre box is non-negotiable for cutting 45-degree angles on window trims; it’s the only way to ensure tight, professional joints. Using the right premium wall solutions starts with using the right tools to secure them.
- Fine-tooth saw: Use an 80-tooth blade minimum for clean, splinter-free edges.
- High-tack polyurethane adhesive: This is essential for bonding to non-porous aluminum window frames.
- Digital moisture meter: This tool confirms the wall is ready for installation.
Safety remains a top priority during the preparation phase. Always wear an N95 respirator when cutting composite materials. These boards release fine dust that can irritate the lungs if inhaled. Using a vacuum-attached saw setup is a smart way to keep your workspace clean and professional while protecting your health.
Measuring and Marking: Precision is the Foundation of Luxury
Success in installing wall panels around windows depends entirely on the accuracy of your initial layout. Premium panels are a significant investment in your home’s aesthetic. The “measure twice, cut once” rule isn’t just a cliché; it’s a financial safeguard. A single 2mm error on a high-end fluted panel can disrupt the visual flow of an entire room, leading to wasted material and increased project costs. When you’re working with sophisticated materials, precision creates the professional “built-in” look that defines luxury interiors.
Before making any marks, you must account for the trim thickness. If you plan to use edge profiles or decorative beading to finish the window perimeter, subtract the width of these components from your final panel dimensions. Failing to do this often results in panels that overlap the window glass or prevent the trim from sitting flush against the frame. Most professional installers in Singapore maintain a 1mm to 2mm expansion gap, which is later concealed by the finishing trim.
Calculating the Window Reveal
The window reveal is the recessed space between the wall surface and the window frame itself. To ensure a flawless finish, follow these steps:
- Measure the depth of the reveal at three different points: the top, middle, and bottom. Walls are rarely perfectly straight, and a 3mm variance is common in many residential structures.
- Use the largest measurement to determine your panel depth if you’re wrapping the material into the reveal.
- Check the vertical alignment of the window frame using a spirit level to see if the window sits “plumb” within the opening.
Actionable Tip: Use a green-beam laser level to project a continuous horizontal line across the window gap. This ensures the pattern on the left side of the window aligns perfectly with the right side, maintaining a cohesive look for your elegant wall solutions.
Marking Complex Cuts
Marking the “L-cut” is the most challenging aspect of installing wall panels around windows. This cut allows a single panel to wrap around the top or bottom corner of the window frame. To protect the premium finish of your panels, apply blue painter’s tape to the surface before marking your lines. This prevents the pencil from staining the material and, more importantly, reduces the risk of the surface veneer chipping during the cutting process.
If you’re working with fluted or textured panels, you must transfer measurements without losing the pattern’s rhythm. Don’t just measure the distance; count the number of “peaks” or “valleys” in the design to ensure the cut falls in a visually pleasing spot. For irregular or arched window shapes, don’t risk your expensive panels. Draft a 1:1 scale template using recycled cardboard first. Once the cardboard fits perfectly against the window frame, trace that shape onto your panel for a guaranteed fit.

The Installation Process: Managing the Reveal and Corners
Achieving a premium aesthetic when installing wall panels around windows requires a blend of technical precision and high-quality materials. You’ll begin by installing the main wall panels toward the window opening. It’s vital to measure the remaining distance from the last full panel to the edge of the window frame, accounting for a 2mm expansion gap. This gap is essential in Singapore’s humid climate, as it allows the material to breathe without warping or buckling over time.
Executing the L-cut is often the most challenging part of the process. For these intricate shapes, use a circular saw for the long, straight vertical and horizontal cuts. Switch to a jigsaw for the internal corner where the two lines meet. This prevents over-cutting and maintains the structural integrity of the panel. Once the cut is complete, dry-fit the panel to ensure it aligns perfectly with the window reveal before you apply any adhesive.
To ensure a long-lasting bond, apply a premium polymer adhesive to the back of the panel in a continuous ‘snake’ or ‘S’ pattern. This technique prevents air pockets from forming and provides maximum surface coverage. Once the panel is pressed against the wall, use a spirit level to check for plumb immediately. You’ve only got a few minutes to make adjustments before the adhesive begins to set, so work efficiently to guarantee a flawless vertical alignment.
Step-by-Step: Cladding the Window Opening
The window reveal is where your attention to detail truly shines. Follow these steps to ensure a professional finish:
- Apply adhesive strategically: Spread the adhesive on the back of the reveal strip, but keep it 10mm away from the very edges to prevent unsightly squeeze-out.
- Position with care: Slide the panel into the reveal, ensuring it sits flush against the window frame. It should feel snug but not forced.
- Manage expansion: Use small plastic spacers to maintain consistent gaps. This ensures the design looks uniform across the entire installation.
- Clean as you go: Wipe away any excess adhesive immediately with a damp microfiber cloth. If the adhesive cures on the surface, it can ruin the premium finish of your elegant wall solutions.
Navigating Internal and External Corners
The transition from the wall face to the window reveal defines the overall quality of the project. For a sophisticated, high-end look, many professionals prefer mitre joints. This involves cutting the edges of both panels at a 45-degree angle so they meet to form a seamless 90-degree corner. While this requires more precision, the result is a stunning, continuous grain or pattern that elevates the room’s design.
Alternatively, butt joints are a practical choice for simpler installations. In this method, one panel overlaps the edge of the other. While easier to execute, the exposed edge must be finished with a matching trim or color-matched sealant to maintain a polished appearance. To achieve the best results, Explore our range of wall accessories for corner profiles that provide a durable and stylish transition. These accessories are designed to hide raw edges and protect high-traffic corners from daily wear and tear.
Finishing Touches: Trims and Professional Secrets
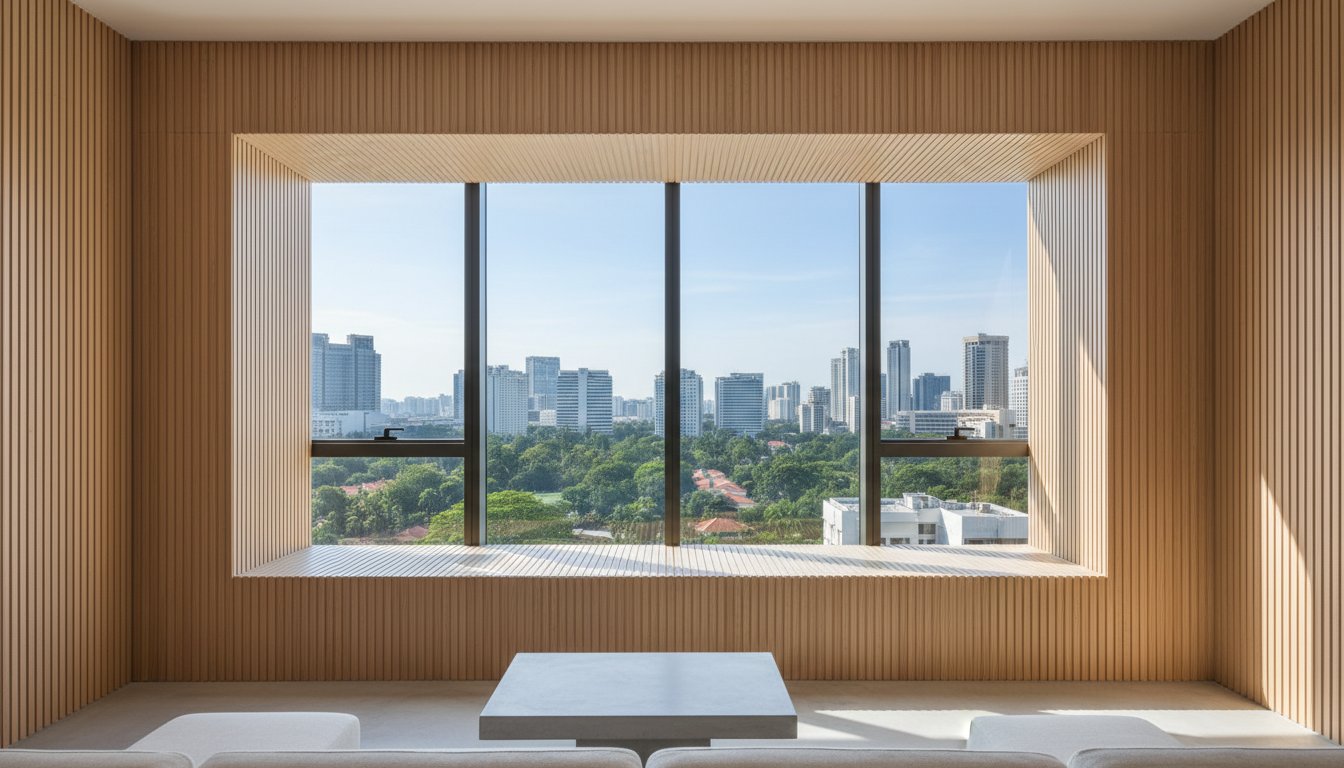
Trims act as the signature of a truly premium project. While the panels provide the aesthetic foundation, the finishing accessories determine if the result looks like a DIY effort or a designer masterpiece. When you’re installing wall panels around windows, these components bridge the gap between the wall surface and the window frame, creating a cohesive and intentional look. Precise trim work hides expansion gaps and protects the panel edges from daily wear.
Achieving a high-end finish requires choosing the right profile for the job. L-shape trims are the most versatile, providing a clean edge where the panel meets the window reveal. Internal corner trims are ideal for deep window recesses, ensuring a sharp, 90-degree transition. The 45-degree mitre cut is the ultimate professional secret for window frame corners. Instead of overlapping trims, which creates a bulky and uneven joint, cutting the ends at a perfect angle ensures a seamless, picture-frame effect that screams quality. Use a fine-toothed saw or a dedicated mitre box to ensure these joints are tight and gap-free.
Choosing the Right Finishing Trims
Aluminum trims are the preferred choice for a modern, industrial aesthetic in Singapore’s contemporary condos. They offer a slim profile and exceptional rigidity. PVC trims remain a popular alternative for traditional styles or high-moisture areas like kitchens. For those using WPC or SPC materials, end-caps are indispensable. These profiles wrap around the edge to hide the dense, multi-layered core of the panel, maintaining the illusion of a solid material throughout. Explore this Sophisticated Guide to Vinyl and Wall Accessories to find the perfect match for your specific panel type.
Sealing for Longevity
Applying a consistent bead of silicone between the trim and the window frame is a critical step for long-term performance. This seal prevents moisture from seeping behind the panels, which is vital in Singapore’s 80% average humidity. Don’t rely on your finger to smooth the sealant. Use a dedicated profiling tool to achieve a flawless, concave silicone line that looks factory-finished. UV-resistant sealants are essential for sun-exposed windows to ensure the bond doesn’t yellow or crack under the intense tropical sun. Precision in sealing doesn’t just improve the look; it protects your investment from mold and structural degradation.
Ready to transform your interior with a professional finish? View our premium wall solutions today.
Maintenance and Durability in Southeast Asian Climates
Singapore’s tropical climate presents unique challenges for interior finishes, particularly in areas exposed to direct sunlight and high humidity. With average humidity levels often exceeding 80 percent, traditional materials can struggle to maintain their integrity. Choosing WPC (Wood Plastic Composite) or SPC (Stone Plastic Composite) provides the perfect foundation for homes in Singapore and Malaysia. These materials are specifically engineered to remain stable despite the intense heat and moisture that characterize our region. When you’re installing wall panels around windows, these premium solutions ensure that your investment looks as sophisticated in ten years as it does on the day of installation.
Managing condensation is a critical factor for longevity. Windows are often the primary site for moisture buildup due to the temperature differential between air-conditioned interiors and the humid outdoors. Nature Living Floor solutions feature non-porous surfaces that prevent moisture from seeping into the core of the panel. This resistance to dampness ensures that your feature wall remains a stunning masterpiece without the risk of mould growth or structural swelling.
Combatting Moisture and Heat
Premium wall panels offer a distinct advantage over traditional timber panelling because they don’t warp or expand significantly when sun-drenched. In Singapore, afternoon sun can heat window-side surfaces to high temperatures, causing natural wood to crack or lose its shape. WPC panels are UV-resistant, maintaining their elegant colour and structural form even in high-exposure areas. Another vital benefit is the termite-proof nature of these materials. Traditional wood is often a target for pests in humid environments, but the synthetic-natural blend of WPC makes it entirely unappealing to termites, protecting your home’s value.
Cleaning and Care
Maintaining a flawless finish doesn’t require a complex routine or expensive equipment. For everyday care, a simple solution of mild soap and warm water is the most effective way to remove dust or light stains. You should avoid using abrasive chemicals, scouring pads, or solvent-based cleaners. These harsh substances can dull the premium finish and strip away the protective top layer of the panels. A soft microfibre cloth is usually all that’s needed to keep the surface looking brand new.
Long-term performance is a hallmark of Nature Living Floor products. By installing wall panels around windows using our high-standard materials, you’re choosing a solution that balances aesthetics with rugged durability. Our panels are designed to resist the common scuffs and impacts of a busy household while retaining their sophisticated appeal. This blend of beauty and long-lasting performance makes them the ideal choice for any modern renovation project.
Discover your perfect wall solution at Nature Living Floor and transform your space into a resilient, stylish sanctuary.
Elevate Your Interior with Masterful Window Detailing
Achieving a high-end look requires more than just high-quality materials; it demands a commitment to precision. By prioritizing accurate measurements and choosing resilient WPC or SPC technology, you ensure your feature walls stand up to Singapore’s average 80% humidity levels without warping. Mastering the art of installing wall panels around windows transforms a standard room into a modern masterpiece. It’s about managing the reveals and using professional-grade trims to create those seamless transitions that define true luxury. These small details separate a basic renovation from a professional finish that lasts for years.
As specialists in advanced WPC and SPC technology, Nature Living Floor provides the perfect foundation for any space. Our elegant designs are engineered specifically for long-lasting performance in Southeast Asian climates, combining sophisticated beauty with the durability your home deserves. You don’t have to settle for anything less than a flawless finish that reflects your unique style. Transform your space with our premium wall solutions and start your journey toward a more refined home today. Your vision of a stunning, modern interior is well within reach.
Frequently Asked Questions
Can I install wall panels directly over existing window tiles?
You can install wall panels directly over existing tiles if the surface is degreased and structurally sound. Use a high-grab polymer adhesive to ensure a permanent bond. This method saves approximately 4 to 6 hours of labor per window by avoiding messy demolition. If tiles are loose or cracked, remove them first to prevent the panel from sagging or detaching over time.
What is the best way to cut fluted wall panels without splintering the edges?
Use a circular saw or miter saw with a fine-tooth blade, ideally one with 80 to 100 teeth, to achieve a clean finish. Place masking tape along the cut line and cut from the back of the panel to prevent the decorative surface from splintering. When installing wall panels around windows, a sharp blade reduces friction and prevents heat buildup that can melt the edges of composite materials.
Do I need to remove the window architrave before installing panels?
Removing the window architrave is the professional standard for a flush, integrated finish. This allows the panel to sit behind the trim, hiding the cut edges entirely. If you choose to keep the architrave, you must use a matching L-shaped edge trim to conceal the 5mm to 10mm gap between the panel and the frame. Many Singaporean HDB renovations favor removing old timber architraves for a modern aesthetic.
How do I handle wall panels if my window frame is not perfectly square?
Use a scribing tool or a compass to transfer the exact contour of the window frame onto your panel before cutting. Even a 2mm deviation can create visible gaps, so always measure at three different points: top, middle, and bottom. Once cut, dry-fit the piece to ensure a snug fit. This technique ensures that installing wall panels around windows results in a sophisticated, gap-free appearance even in older buildings.
Is it necessary to use a primer on the wall before applying adhesive?
Apply a dedicated wall primer if you’re working on bare plaster or dusty masonry to ensure maximum adhesive suction. A single coat of acrylic primer dries in 30 to 60 minutes and increases the bond strength by up to 40 percent. For painted walls, a quick wipe with sugar soap is usually sufficient. Skipping this step often leads to panels peeling away within 12 to 18 months due to poor surface tension.
Can wall panels be installed in high-humidity areas like bathroom windows?
Choose 100 percent waterproof composite or PVC panels for bathroom windows to prevent warping or mold growth. You must apply a continuous bead of silicone sealant in every joint and around the window perimeter to create a watertight barrier. In Singapore’s 80 percent average humidity, using a premium moisture-resistant adhesive is essential for long-term performance. This creates a stylish solution that stands up to daily steam.
How much of an expansion gap should I leave around the window frame?
Leave a 2mm to 3mm expansion gap between the panel edge and the window frame to allow for natural thermal movement. Materials expand and contract as temperatures fluctuate, particularly near glass that absorbs direct sunlight. Fill this gap with a color-matched flexible silicone or acrylic caulk. This small allowance prevents the panels from buckling during Singapore’s hottest months when afternoon temperatures often exceed 32 degrees Celsius.
Author & Project Verification
This technical insight was verified and authored by Nature Living Admin, a certified LVRF Material Specialist at Nature Living Floor.
Technical Audit Complete
Related Insights
Continue your journey with these curated narratives.