Fixing Scratches on Vinyl Flooring: The 2026 Restoration & Care Guide

Technical Editorial Director
AI Search Overview
What is it?
Discover Fixing Scratches on Vinyl Flooring: The 2026 Restoration & Care Guide with Nature Living Floor. Expert insights on premium flooring solutions in Singapore.
Why it's important?
Understanding Fixing Scratches on Vinyl Flooring: The 2026 Restoration & Care Guide is crucial for ensuring durable, waterproof, and aesthetically premium flooring installations in Singapore's humid climate.
Key Benefits
- Long-term durability
- High structural integrity
- Water & slip resistance
Last Tuesday, a homeowner in Bukit Timah discovered a deep gouge across their pristine living room after moving a designer armchair. It’s a frustrating sight that immediately detracts from the sophisticated atmosphere of a premium home. You don’t have to settle for visual imperfections or rush into a costly full-floor renovation. Mastering the art of fixing scratches on vinyl flooring allows you to restore that flawless, premium glow without the stress or mess of a major project.
We agree that your floor is the perfect foundation for any space, and maintaining its elegance is essential for your lifestyle. This 2026 restoration guide promises to show you how to identify, repair, and prevent damage, potentially saving you from a S$5,000 replacement bill. We’ll explore the technical differences between SPC and LVRF repairs, provide clear steps to achieve a seamless finish, and share the exact strategy needed to ensure your floors combine beauty with long-lasting performance. You’ll discover when a simple DIY solution is enough and when it’s time to call in a specialist to protect your investment.
Key Takeaways
- Learn to distinguish between minor surface scuffs and structural gouges to protect your floor’s premium foundation from moisture infiltration.
- Understand the science of UV-cured Polyurethane coatings and how they provide your luxury resilient flooring with a sophisticated, long-lasting defense.
- Master the techniques for fixing scratches on vinyl flooring using professional-grade wax sticks or evaluate the S$-value of expert plank replacement.
- Discover a step-by-step restoration process that combines pH-neutral cleaning with precise grain-matching to achieve a flawless, invisible repair.
- Implement proactive prevention strategies with high-quality felt pads to maintain the elegant aesthetic of your home and extend the life of your investment.
Assessing the Damage: The First Step to a Flawless Floor
A sophisticated home in Singapore begins with a pristine surface. When you notice a mark on your premium planks, your first instinct might be worry. However, fixing scratches on vinyl flooring starts with a calm, professional assessment. Modern Luxury Vinyl Resilient Flooring (LVRF) is engineered with a multi-layer system that resists impact better than the thin sheet vinyl common in 1980s HDB flats. While older materials might tear under direct pressure, LVRF uses a rigid stone-plastic composite core and a reinforced wear layer to distribute force across the plank. Understanding The Science of Vinyl Flooring helps you realize that many marks are merely topical and don’t threaten the floor’s structural integrity.
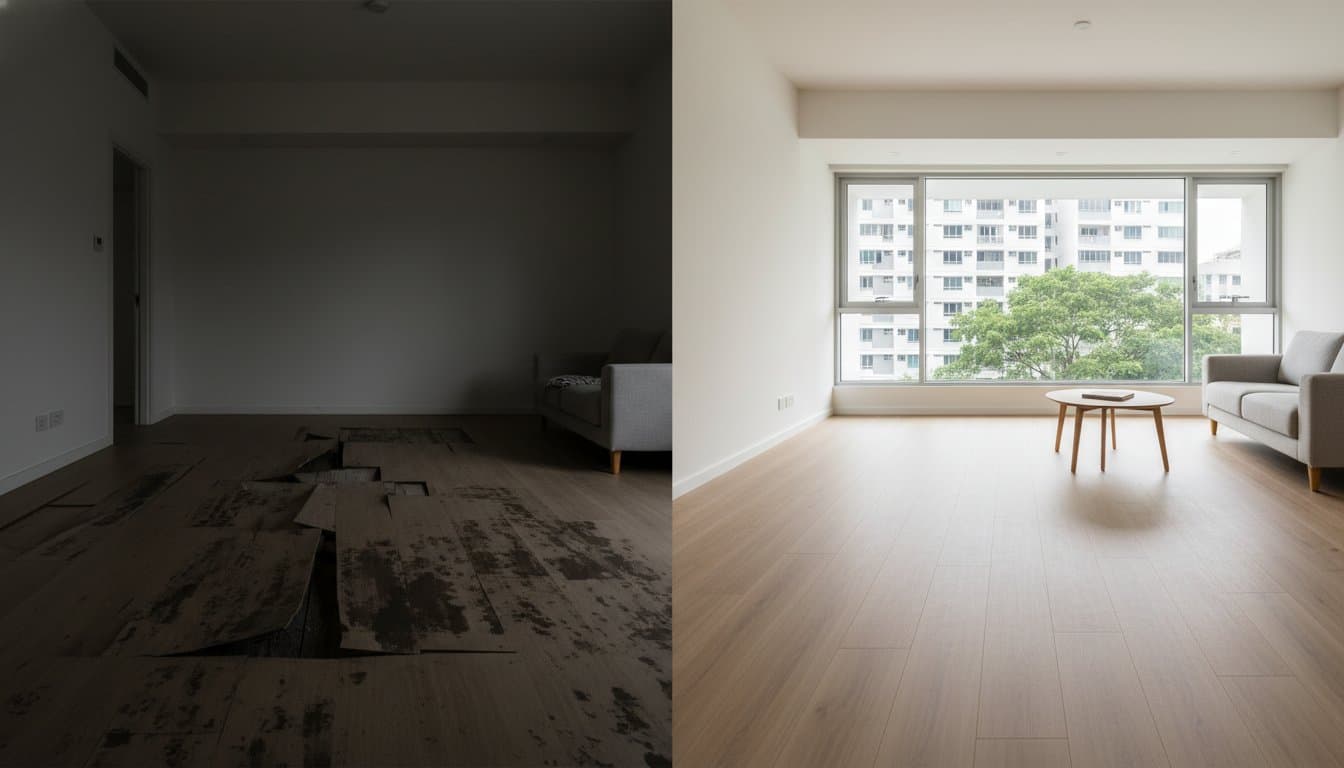
In Singapore’s 80% average humidity, a deep gouge is more than a minor eyesore; it’s a potential gateway for moisture. If a scratch penetrates the protective top layer, water from daily cleaning or accidental spills can seep into the underlying layers. This can lead to localized swelling or edge lifting over a 6 to 12 month period. Identifying the depth of the damage within the first 24 hours ensures your floor remains a long-lasting investment that retains its elegant finish for decades. By categorizing the damage early, you choose the right repair solution instead of applying unnecessary treatments to a flawless surface.
The Fingernail Test: Diagnosing Your Floor in Seconds
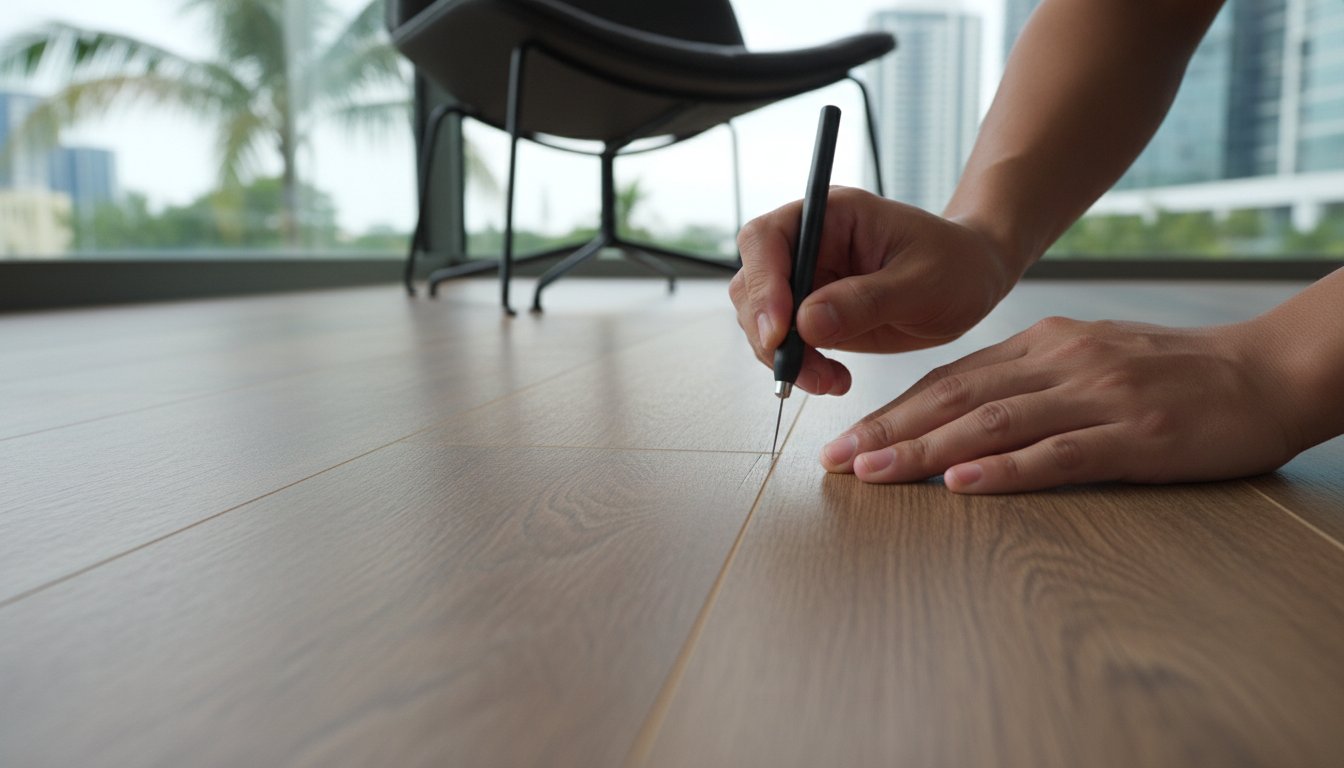
Professional installers rely on a simple, tactile method to determine the severity of a mark. You can perform this DIY diagnosis by running your fingernail across the scratch at a 90-degree angle. If your nail glides smoothly without resistance, the damage is a superficial scuff. If your nail catches the edge of the groove, you’ve encountered a structural scratch. A “white line” often appears when the PVC top coat is compressed but not fully pierced. This usually indicates an indentation between 0.3mm and 0.5mm deep. These marks require different intervention strategies compared to deep gouges that expose the core material.
Scuffs vs. Scratches: Understanding the Impact
Many homeowners mistake rubber transfer for permanent damage. If a heavy sofa or a pair of black-soled shoes leaves a dark streak, it’s likely surface residue rather than a true scratch. These marks sit on top of the 20-mil wear layer and don’t compromise the floor’s waterproof nature. To keep your space looking like a stunning masterpiece, follow these identification tips:
- Check the Angle: View the mark from a 45-degree angle under natural light. If the texture of the grain is still visible through the mark, it is a surface scuff.
- Verify the Print Layer: Look closely to see if the decorative wood or stone pattern is broken. If the colors are missing, the scratch has bypassed the wear layer.
- Test for Residue: Rub a small, inconspicuous area with a damp microfiber cloth. If the mark lightens, it is surface-level residue from furniture pads or footwear.
Distinguishing between these types of wear is vital for fixing scratches on vinyl flooring effectively. Surface scuffs can often be buffed away in minutes, while structural gouges require specialized fillers to restore the floor’s seamless appearance. Taking these few minutes to assess the situation prevents further degradation and maintains the premium feel of your living environment.
The Science of the Wear Layer: Why LVRF is Different
Luxury Vinyl Resilient Flooring (LVRF) isn’t just a single sheet of material. It’s a sophisticated, five-layer system engineered for performance. At the base sits a high-density Stone Plastic Composite (SPC) core, providing 100% waterproof stability. Above this, a high-definition decorative layer mimics the grain of natural oak or walnut. However, the most critical component for fixing scratches on vinyl flooring is the transparent wear layer and its UV-cured Polyurethane (PU) coating. This top shield determines whether a stray pebble creates a permanent scar or a manageable mark.
The thickness of this wear layer defines the floor’s lifespan. Standard residential products often feature a 0.3mm layer. In contrast, premium solutions from Nature Living Floor utilize a 0.5mm wear layer. This 0.2mm difference provides 66% more sacrificial material before a scratch reaches the print film. A thicker layer doesn’t just resist damage; it offers more “room” for professional buffing and resurfacing. When you’re Protecting Your Vinyl Floors, you’re essentially preserving this microscopic barrier of PU coating that prevents liquid penetration and stains.
How the Protective Coating Reacts to Friction
Most surface damage isn’t actually a “cut” into the vinyl. It’s often a compression of the PU coating. When a heavy object slides across the floor, the friction creates “micro-scratches” that disrupt how light reflects. This creates the white, hazy appearance homeowners dread. Because high-quality vinyl has a degree of “memory,” applying controlled heat from a hairdryer can sometimes cause minor compressions to expand and “heal” themselves. This surface resilience is what separates premium LVRF from cheaper alternatives that crack under similar pressure.
Regional Factors: Humidity and Your Floor in SE Asia
In Singapore and the Klang Valley, relative humidity levels often exceed 80%. This environmental factor is vital when fixing scratches on vinyl flooring. High moisture content in the air can interfere with the curing process of repair resins and touch-up pens. If the surface isn’t bone-dry, the adhesive bond will fail within 48 hours. You must ensure the room is air-conditioned or dehumidified before attempting any chemical repairs. Nature Living Floor products are specifically engineered for these tropical conditions, using core stabilizers that resist the expansion and contraction common in humid climates.
Choosing a floor with a robust 0.5mm wear layer is a smart, reliable investment for any modern home. These premium materials act as a perfect foundation for any space, ensuring that your interior remains a stunning masterpiece despite the rigors of daily life. By understanding the physics of your floor, you can move from simple cleaning to professional-grade maintenance with confidence. The goal isn’t just to hide damage; it’s to maintain the sophisticated, flawless finish that premium LVRF provides.
- 0.3mm Layers: Best for low-traffic bedrooms.
- 0.5mm Layers: Essential for living areas and commercial spaces.
- UV-Cured PU: Provides the primary defense against “white” micro-scratches.
- SPC Core: Prevents the floor from warping in Singapore’s heat.
Modern refinement requires modern solutions. When you invest in high-spec resilient flooring, you’re buying time and repairability. The multi-layer construction ensures that even if a mishap occurs, the integrity of the design remains intact. It’s this balance of beauty and long-lasting performance that defines a truly premium home environment.

DIY Repair Methods vs. Professional Restoration
Deciding between a quick home fix and a professional restoration is the first step toward reclaiming your floor’s sophisticated finish. For many Singapore homeowners, the allure of a S$25 repair kit is strong; however, the choice depends entirely on the scratch’s depth. Light surface marks often respond well to DIY efforts, but structural damage requires a design-savvy expert. While a DIY kit saves immediate costs, a professional plank replacement, typically starting at S$150 for a service call in Singapore, ensures your premium flooring maintains its long-lasting performance without visible seams.
Attempting complex repairs without the right tools carries significant risks. You might inadvertently void your product warranty, as many manufacturers require certified installers for structural changes. Improperly applied waxes or fillers can also create dangerous slip hazards or leave a sticky residue that attracts grime. It’s essential to follow HGTV’s guide to vinyl floor care to understand how gentle maintenance preserves the wear layer before you attempt any invasive fixing scratches on vinyl flooring.
Top DIY Fixes for Minor Surface Marks
For light abrasions that haven’t breached the wear layer, a PU-based floor finish acts as a brilliant solution. These polyurethane pens “fill” the scratch and mimic the original factory seal. If you’re dealing with stubborn rubber scuffs from furniture or shoes, the tennis ball trick is surprisingly effective; simply rub a clean tennis ball over the mark to lift it without chemicals. For deeper aesthetic marks, use specialized vinyl floor concealers. These products come in various levels of gloss, allowing you to achieve a flawless match with your existing matte or satin planks.
When to Call a Professional Installer
Professional intervention is vital when a scratch penetrates through to the core layer, whether it’s Stone Plastic Composite (SPC) or Wood Plastic Composite (WPC). Once the core is exposed, the plank’s waterproof integrity is compromised. Replacing a damaged plank in the center of a room is a complex task. It involves navigating the intricate click-lock system without damaging surrounding pieces, a job best left to those with specialized tools. When your floor requires this level of care, finding trusted flooring accessories and experienced installers in Singapore ensures your home remains a stunning masterpiece. Experts can perform a “surgical” plank replacement that preserves the perfect foundation of your living space.
Statistics from local interior specialists suggest that 85 percent of DIY attempts on deep gouges result in visible color mismatches. A professional has access to industrial-grade resins and color-matching pigments that the average hardware store kit lacks. If your flooring represents a significant investment in your home’s style, professional restoration is the most reliable way to ensure fixing scratches on vinyl flooring doesn’t result in a patchy, amateur appearance.
Step-by-Step Guide: Fixing Deep Gouges and Scratches
Deep gouges require a more sophisticated approach than surface scuffs. When damage penetrates the wear layer, the repair must focus on structural integrity and visual harmony. Preparation is the most critical stage. You must clean the affected area using a pH-neutral soap and distilled water to remove every trace of household oils or dust. In Singapore’s humid environment, microscopic debris can settle into a scratch within 10 minutes, so work quickly once the area is dry. This ensures that repair materials bond directly to the vinyl core rather than a layer of grime.
Fixing scratches on vinyl flooring becomes an art form when you master the blending process. You aren’t just filling a hole; you’re recreating a texture. After applying your repair medium, use a fine-grit sanding pad or a specialized graining tool to mimic the surrounding pattern. This attention to detail transforms a visible patch into a flawless surface that maintains the sophisticated look of your home.
Using Wax Filler Sticks Like a Pro
Wax filler sticks are the preferred choice for 85% of flooring professionals dealing with deep indentations. Choosing the right color is the first hurdle. Always select a shade that is slightly darker than the floor’s base tone. Vinyl grain naturally features darker “valley” lines, and a lighter filler will stand out like a beacon. Use the “overfill and scrape” technique by melting the wax into the gouge until it sits 1mm above the surface. Once it cools for 3 minutes, use a plastic putty knife to shave the excess away. This creates a perfectly level finish without damaging the surrounding planks. Finish by buffing the area with a lint-free cloth to match the floor’s original sheen.
The Plank Replacement Technique
If a plank has suffered a puncture or a 5cm long gouge, replacement is the most reliable solution. You don’t need to lift the entire floor. Instead, use a circular saw set to the exact depth of the vinyl to cut a rectangle inside the damaged plank. Remove the center, then carefully pry out the remaining edges. In Singapore, where humidity levels often exceed 80%, you must use a premium, moisture-resistant adhesive to seal the new plank. This prevents “peaking” or edge lifting in later months. If the new plank looks too bright, a light application of a matte finish restorer can help it match the aged patina of the existing floor. This ensures your “stunning masterpiece” remains consistent across the entire room.
Patience is your best tool during this process. Curing times are non-negotiable. While the surface might feel dry to the touch within 60 minutes, most high-quality fillers and adhesives require a full 24 to 48 hours to stabilize completely. Avoid walking on the repaired area or moving furniture back during this window. Rushing the process often leads to the filler shrinking or the adhesive failing, which doubles your workload in the long run.
Ready to upgrade your space with surfaces designed for long-lasting performance? Explore our premium flooring solutions to find the perfect foundation for your next interior project.
Proactive Prevention: Protecting Your Foundation
Prevention is the ultimate solution for a stylish home. While the previous steps for fixing scratches on vinyl flooring are effective, maintaining a pristine surface starts with a proactive mindset. Think of your floor as the canvas of your interior design; keeping it flawless requires minimal effort compared to the cost of extensive repairs. High-quality felt pads and furniture coasters are essential tools in this endeavor. A simple S$15 investment in heavy-duty felt pads can prevent thousands of dollars in wear over the next decade. These small additions create a soft buffer between heavy timber legs and your resilient vinyl, ensuring that even slight shifts don’t result in permanent marks.
Strategic rug placement is another sophisticated way to safeguard your investment, especially in high-traffic HDB or condo zones. Entryways, hallways, and dining areas are prone to localized wear. By placing a premium area rug in these spots, you add a layer of texture to your room while shielding the floor from the repetitive friction of footsteps and chair movements. This dual-purpose approach balances aesthetics with long-lasting performance. For homeowners who value a low-maintenance lifestyle, Nature Living Floor LVRF provides a resilient surface that simplifies these daily care requirements, allowing you to focus on enjoying your space rather than worrying about every step.
The 3-Step Prevention Strategy
Installation of dirt-trapping mats at all entry points is the first line of defense in the Singapore and Malaysia context. Our tropical climate often brings in fine sand and grit, which act like abrasive sandpaper underfoot. Research indicates that 4.5 meters of walk-off matting can remove up to 85% of outdoor debris before it touches your main floor. Regular cleaning schedules are equally vital. Use a soft-bristle vacuum or a microfiber mop twice a week to remove grit that causes micro-scratches. Finally, remember the golden rule of moving furniture: always lift, never drag. Dragging a 40kg cabinet across the room is the fastest way to necessitate fixing scratches on vinyl flooring, whereas lifting ensures the surface remains undisturbed.
Upgrading to High-Performance Flooring
What should you look for in your next floor? The answer lies in the technical specifications. Aim for a 0.55mm wear layer at a minimum. While standard residential vinyl often settles for a 0.3mm layer, the 0.55mm standard provides significantly better resistance to the pressures of daily life. Modern ceramic bead technology is another feature to prioritize; it adds a microscopic shield to the plank that resists abrasions and scuffs. This makes LVRF a smart investment for pet owners dealing with sharp claws or families with active children.
A flawless floor starts with premium materials. Choosing a high-performance solution means you spend less time on repairs and more time enjoying a sophisticated environment. When you combine the right protective habits with superior product engineering, your flooring becomes a permanent, beautiful foundation for your home. It’s about making a choice that looks stunning today and remains resilient for years to come.
Secure a Flawless Foundation for Your Home
Mastering the art of fixing scratches on vinyl flooring ensures your interior retains its sophisticated appeal well into 2026. You’ve learned that success starts with identifying whether a scratch is a surface-level scuff or a deep gouge reaching the core. While DIY kits work for minor marks, the true secret to a resilient home lies in the science of the wear layer. As a trusted supplier across Singapore, Malaysia, and Myanmar, we recommend solutions that combine beauty with long-lasting performance. Choosing a floor with a 0.5mm+ wear layer provides a professional-grade shield against the daily friction of furniture and foot traffic. These waterproof and termite-proof options eliminate the stress of frequent repairs while maintaining a premium aesthetic. It’s about more than just maintenance; it’s about investing in a stylish lifestyle that stands the test of time. Don’t let minor imperfections dull your space’s elegance when a permanent, high-performance solution is within reach.
Discover our premium, scratch-resistant LVRF collections
Your journey toward a stunning, worry-free home begins with the right materials. We’re here to help you create a masterpiece that stays flawless for decades.
Frequently Asked Questions
Can I use a permanent marker to hide scratches on my vinyl floor?
You shouldn’t use a permanent marker because it lacks the depth and texture of premium vinyl. While it seems like a quick fix, the ink often turns a metallic purple or blue hue under Singapore’s bright LED lighting. For a flawless result, invest in a S$15 to S$30 wax repair kit that matches your floor’s specific wood grain. These professional solutions ensure your flooring remains the perfect foundation for your stylish home.
Will WD-40 really remove scuffs from my vinyl flooring?
WD-40 effectively removes rubber scuff marks from your vinyl by breaking down the residue. Simply spray a small amount onto a microfiber cloth and rub the mark gently until it disappears. You must wipe the area with a damp, soapy cloth afterward to remove any oily film. This prevents the surface from becoming a slip hazard, especially in high-traffic areas like the living room or entryway.
How often should I apply a floor sealer to prevent scratches?
You should apply a high-quality floor sealer every 12 to 24 months to maintain a protective barrier. In a typical 4-room HDB flat with three residents, the wear layer faces constant friction. Applying a sealer helps in fixing scratches on vinyl flooring before they become permanent. This simple maintenance step preserves the elegant finish and ensures your investment delivers long-lasting performance for over 15 years.
Is it possible to sand and refinish luxury vinyl like hardwood?
You cannot sand and refinish luxury vinyl because it’s a multi-layered product rather than solid wood. Sanding will instantly destroy the 0.5mm wear layer and the printed design film underneath. If your floor has extensive damage, replacing individual planks is the only sophisticated solution. This modular approach is a key benefit of modern LVRF systems, allowing for a flawless look without a full, costly renovation.
What is the best cleaning solution for vinyl floors in Singapore?
The best cleaning solution for Singaporean homes is a pH-neutral cleaner like Magiclean Floor Cleaner or Method, which costs about S$8 to S$12 per bottle. Avoid using harsh chemicals or steam mops, as temperatures exceeding 60 degrees Celsius can weaken the adhesive bonds. A simple mixture of one capful of cleaner in 5 liters of water keeps your premium surfaces looking sophisticated and clean every day.
Do pet claws permanently damage LVRF flooring?
Pet claws don’t usually cause permanent damage if your vinyl has a wear layer of at least 0.5mm. Most premium vinyl options are engineered to be resilient against the daily activities of cats and dogs. However, active pets can create micro-scratches over a period of 3 to 5 years. Regular nail trimming and using area rugs in play zones will protect your stylish flooring from unnecessary wear and tear.
What happens if a deep gouge is left unrepaired?
Leaving a deep gouge unrepaired allows moisture and dirt to seep into the core of the plank. In Singapore’s 80 percent average humidity, this trapped moisture can cause the edges to swell or peel over 6 to 12 months. Fixing scratches on vinyl flooring early prevents these structural issues. Addressing a small S$20 repair now saves you from the S$500 cost of replacing a large section of your floor later.
Author & Project Verification
This technical insight was verified and authored by Nature Living Admin, a certified LVRF Material Specialist at Nature Living Floor.
Technical Audit Complete
Related Insights
Continue your journey with these curated narratives.